4-Point Racing Harness Installation For Coupe
Multi Point Harness
Anyone who has driven his/her car a little more aggressively or even been on a race track with it knows what happens in every turn. Even though you have your safety belt on you walk around in the seat looking to find something to hold on while trying to turn, stop, accelerate or switch gears. The solution to this “problem” is precisely the multi-point belts. Here we will not go into much details why it is nice to have them and how they protect you more than the ordinary 3-point safety belts. In the “Notes” section below you will find additional information if you are more curious.
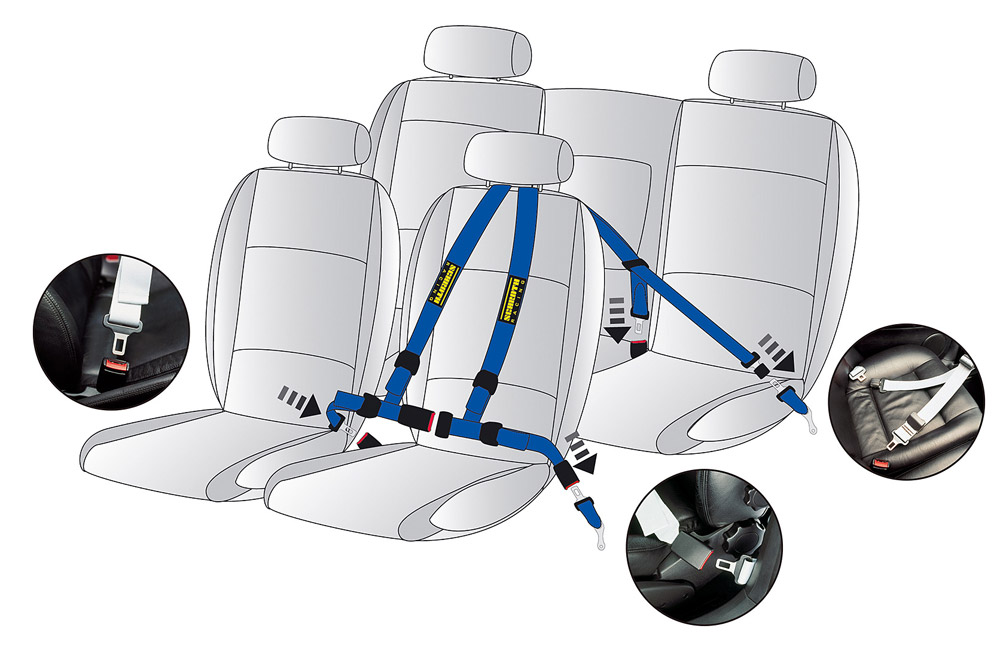
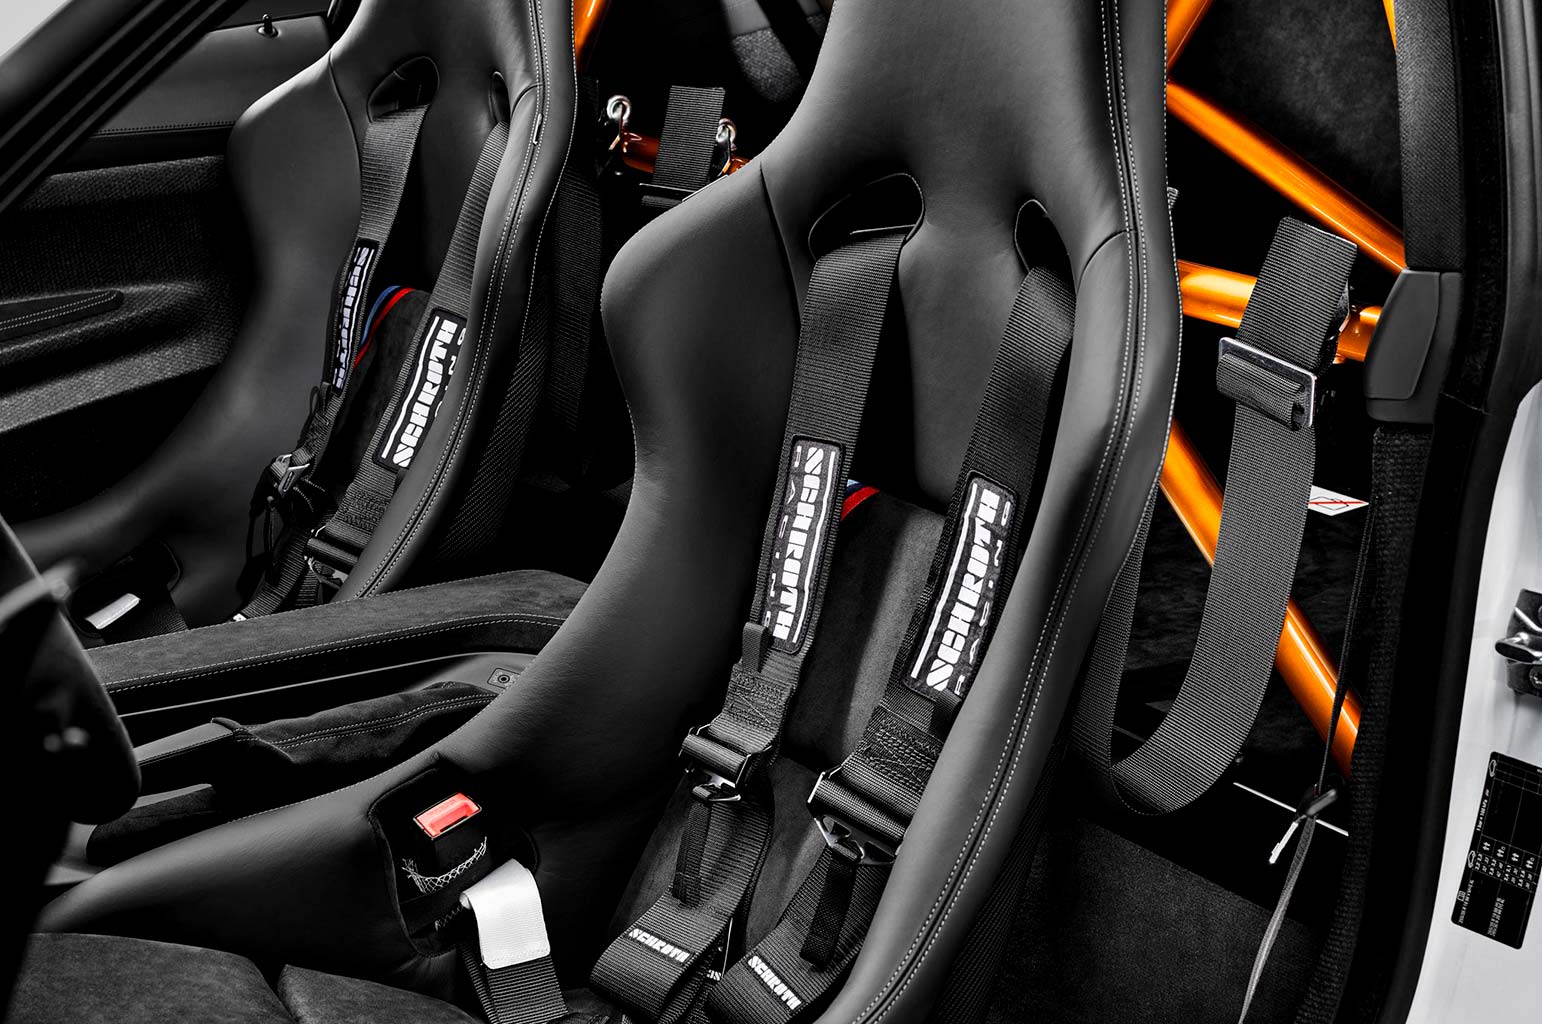
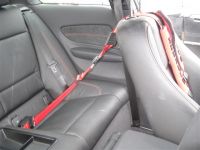
The purpose of this article is to show how you can easily install 4-point belts in your car without stripping half the interior and replacing number of parts that you have to put back where they were after you drive your car on the race track. The following pictures illustrate our final goal. The installation takes 5-10 minutes and the same time to bring your car back to its original look. Of course there will be a few trifles that you have to prepare in advance the first time you do it.
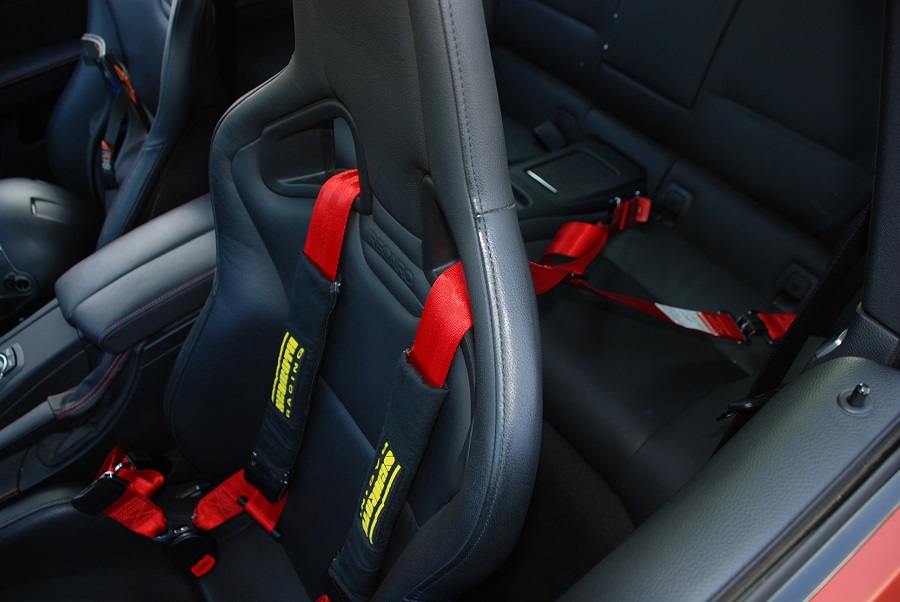
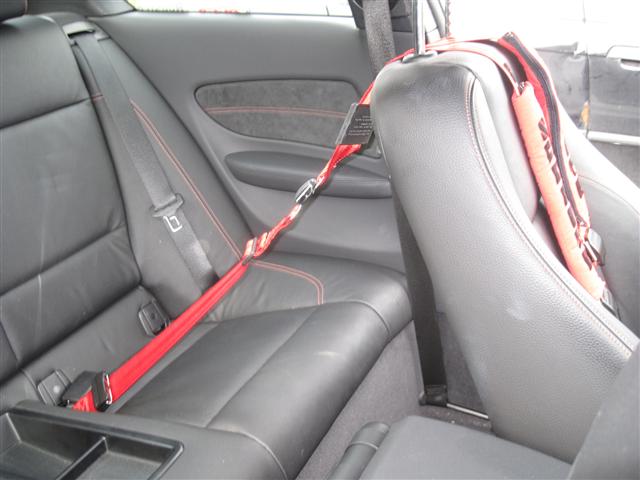
The Shoulder Belts
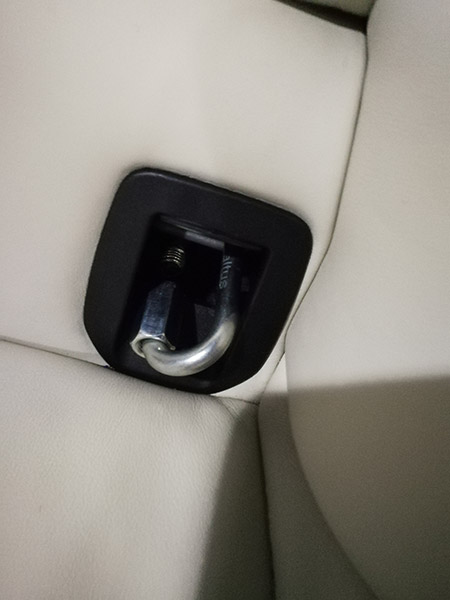
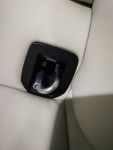
We will start with the shoulder straps because they are the easiest to install. You need two maillons at 8mm. When closed they are rated to 25 kN and one person, which is approximately 2550 kg or about 25-30 times your weight. These are the smallest possible maillons that will fit through the ISOFIX decorative plastic trims in the rear seats.
This will allow you to extend the fastening points of the child seat so that the quick links of the 4-point belts for the shoulders straps can be attached to it without disassembling anything on the rear seats. This is necessary because the quick links of the belts are very thick and do not fit directly into the openings of the ISOFIX trims. Actually carabiners would also do the job but unfortunately those that are rated at least to 22 kN are even bigger and thicker than the maillons and do not fit through the trim. From the pictures on the right you will get an idea of what you need to achieve. The maillons in question are actually quite cheap – 2-3 euro per item.
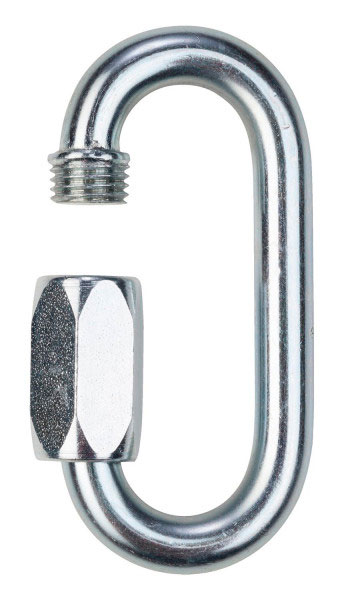
The Left Waist Belt
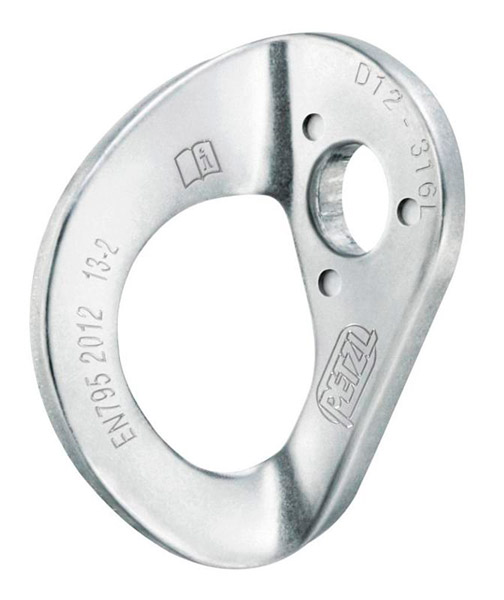
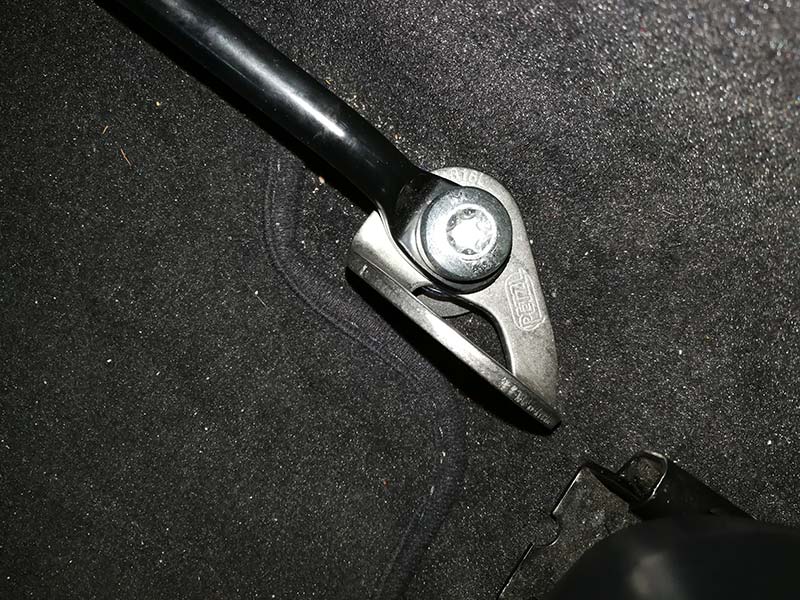
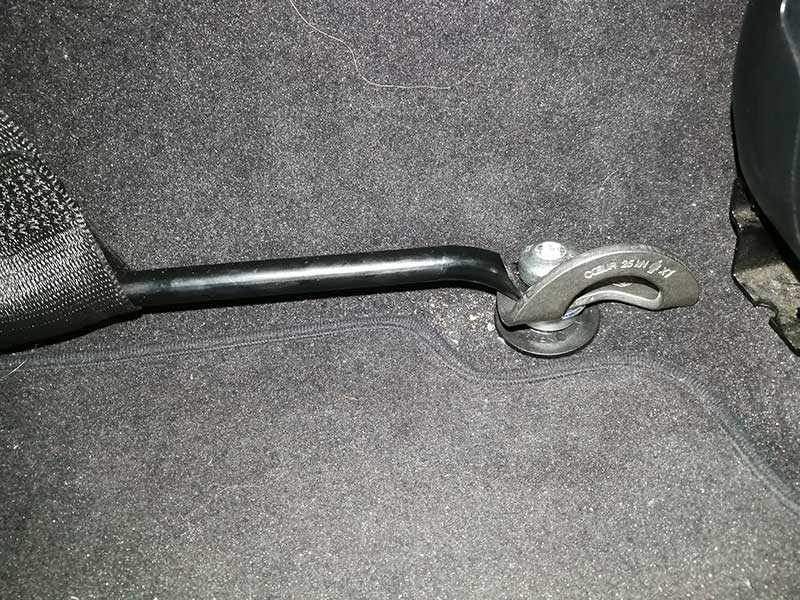
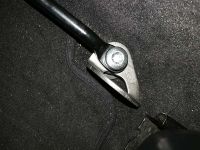
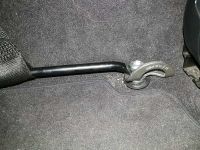
This is the next relatively easy step. The regular safety seat belt is fastened on the floor on a rail that is located below to the left and behind the driver’s seat. Unfortunately, the quick link of the 4-point belts is again too big to fit and can not be caught directly on the rail or anywhere around. That is why you have to remove the plastic cap and unscrew the bolt beneath it that holds the rail to the floor (you will need a Torx T50 for this part). Then put an L-shaped plate (the picture on the right) and screw the bolt through it so that it fasten back the rail to the floor. The small hole in the plate that the bolt goes through may be 10 or 12 mm. It is a good idea to pull out the bolt and measure it before you buy any plate. Again the price is not a deal breaker – expect something in the range of 2-3 euro per piece.
This way you will provide something to snap the quick link of the 4-point belt strap. There is also a very important thing we gain with the L-shaped plate – at the moment of an incident the forces through which the belt will act on the plate and the rail that holds it to the floor will be directed mainly forward and there will be no bending of any element. This plate is also rated for 1 person and 25 kN as the maillons that we mentioned earlier. If you decide you can leave the plate in place after the track day. It stays pretty low and close to the floor so it will not hinder in any way. The following pictures show what your car will look like after the plate assembly.
The Right Waist Belt
And now we come to the most complicated part of the entire installation… On the right side of the seat there is no place to fit or fasten the thick link of the 4-point belt strap. Since we will not use the original safety belt on the track their buckle pretensioner will remain unused and we could take advantage of that. Immediately we gain two things. The car will not blink or sound any reminders that we have not put on our safety belt and secondly – in the event of an accident the airbags will open even though we have not put on our safety belt. To do this however, we need to prepare two things – the original clip that snaps into the buckle pretensioner and a metal plate around which to wrap the free end of the 4-point belt strap.
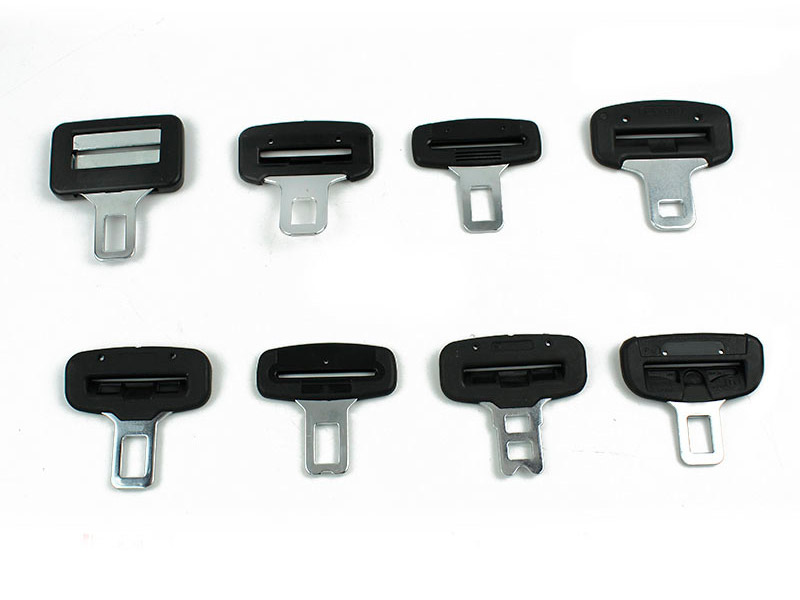
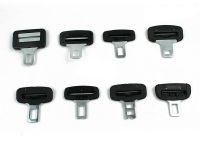
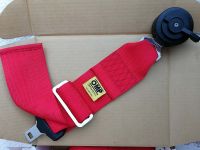
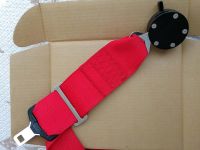
The original snap-in clip has a lot of variations (the picture on the right) so make sure you check what type is your before you buy one. You can find these at some car morgue that sell cars into pieces. It may even be easier and cheaper if you pick a clip from a different brand and model other than BMW because some sellers are not always willing to cut the belt only to remove the snap-in clip. You will probably have to expand the belt hole in the clip because the 4-point harness straps are thicker than conventional safety belt straps and will not pass through the opening.
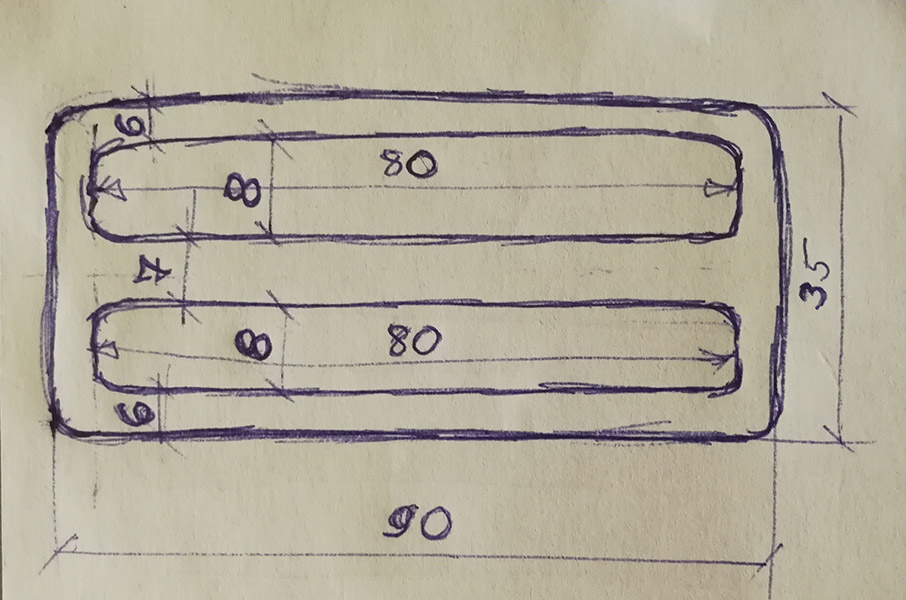
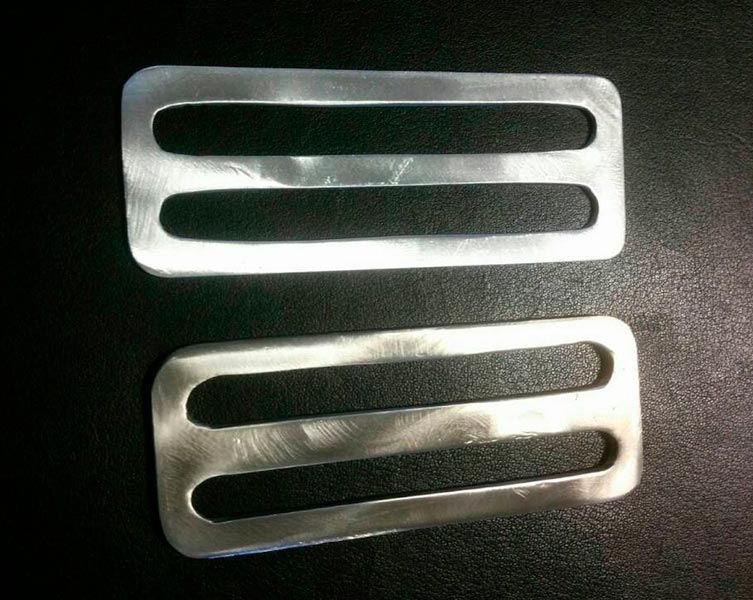
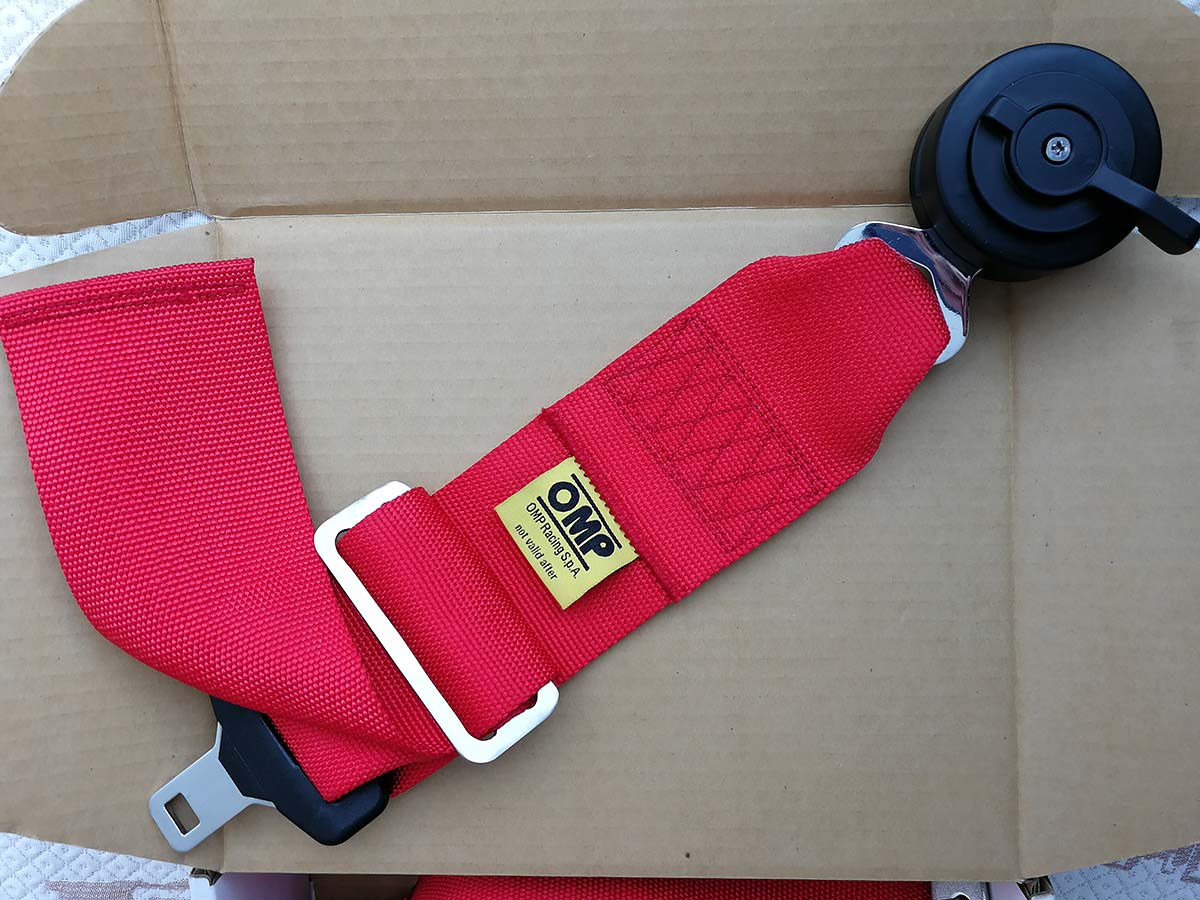
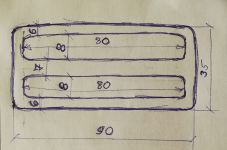
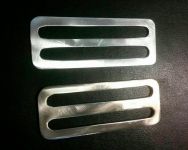
The metal plate with the two holes is necessary in order to twist the belt through it so that it does not slip. One of the pictures below shows the dimensions of a similar plate in mm. On the other picture there are two such clips (you need only one though). We leave it to your imagination and creativity to make one of these because we do not know exactly a place where you can buy it directly. There is also an option to combine these two elements into one – the metal plate, with two holes, continues at its one end and resembles the metal part of the original belt clip to snap directly into the buckle pretensioner. We are sure you will find a way to tailor something. 🙂
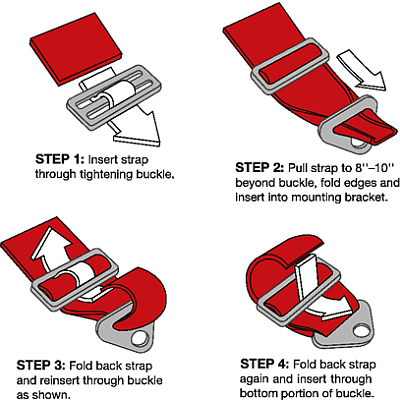
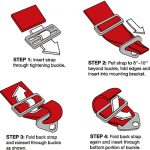
The third picture below shows the scheme how the free end of the belt strap should be wrapped around the metal plate. We say “free end” as you need to disassemble this belt strap and remove the part that ends with the fast clip from the strap.
If you have done everything right as described above you will get a small piece of belt similar to the one from the pictures below. One of its end is the buckle of the 4-point belt and the other end is the clip to snap-in the buckle pretensioner.

Installing The Belts
And finally we come to the easiest part of the whole installation – clicking the 4-point belts straps into place. And voila – you are done!
We will be happy if you share your thoughts in the comments section below. Also do not hesitate to ask for more pictures or details if you need them. Have a nice time at the race track! 🙂




Great article and inspiration!
Have you thought about the kn of the isofix themselves? Love the setup, but isofix points are going to be the weak point; from what I can find, they are rated to 33kg static weight, or 8kn, so significantly less than the rest of the harness install. Obviously, there are two of them, so in a head on there would be 16nm capacity, but something to consider as it may only be suitable for quite light people.
BTW, the metal plates are called tri-glides, which should help finding premade ones.
I am going to get a harness that reaches to the rear passenger top mount, but use your idea of the buckle key being added to the lap part of the harness.
Thanks!
Hello does this system work with the new 2022 M240i xdrive G42 series ?
Thank you
Hello,
Of course. It will work on any coupe or sedan.
Best regards!